The web widget is the most common way Owlish ships in front of customers — a floating chat bubble that opens to a panel on your site. It’s available on every plan and works on any website.
Where widget configuration lives
Widget settings are split across two pages on the agent:
- Playground — visual customization (Brand, Content, Behavior tabs). See Customize the widget.
- Channels → Web widget — domain allowlist and channel-specific toggles like citation display.
Channels page settings
Open the agent → Channels → Web widget to configure:
- Allowed domains — a list of domains where the widget is allowed to load. Requests from other origins are rejected. Add every production domain you’ll embed on, plus any staging domains for testing.
- Enforce allowed domains — toggle. When on, requests from non-listed origins are rejected. Turn off temporarily for development if needed; turn back on for production.
- Citation config — whether to show source citations on agent answers in the widget. On by default.
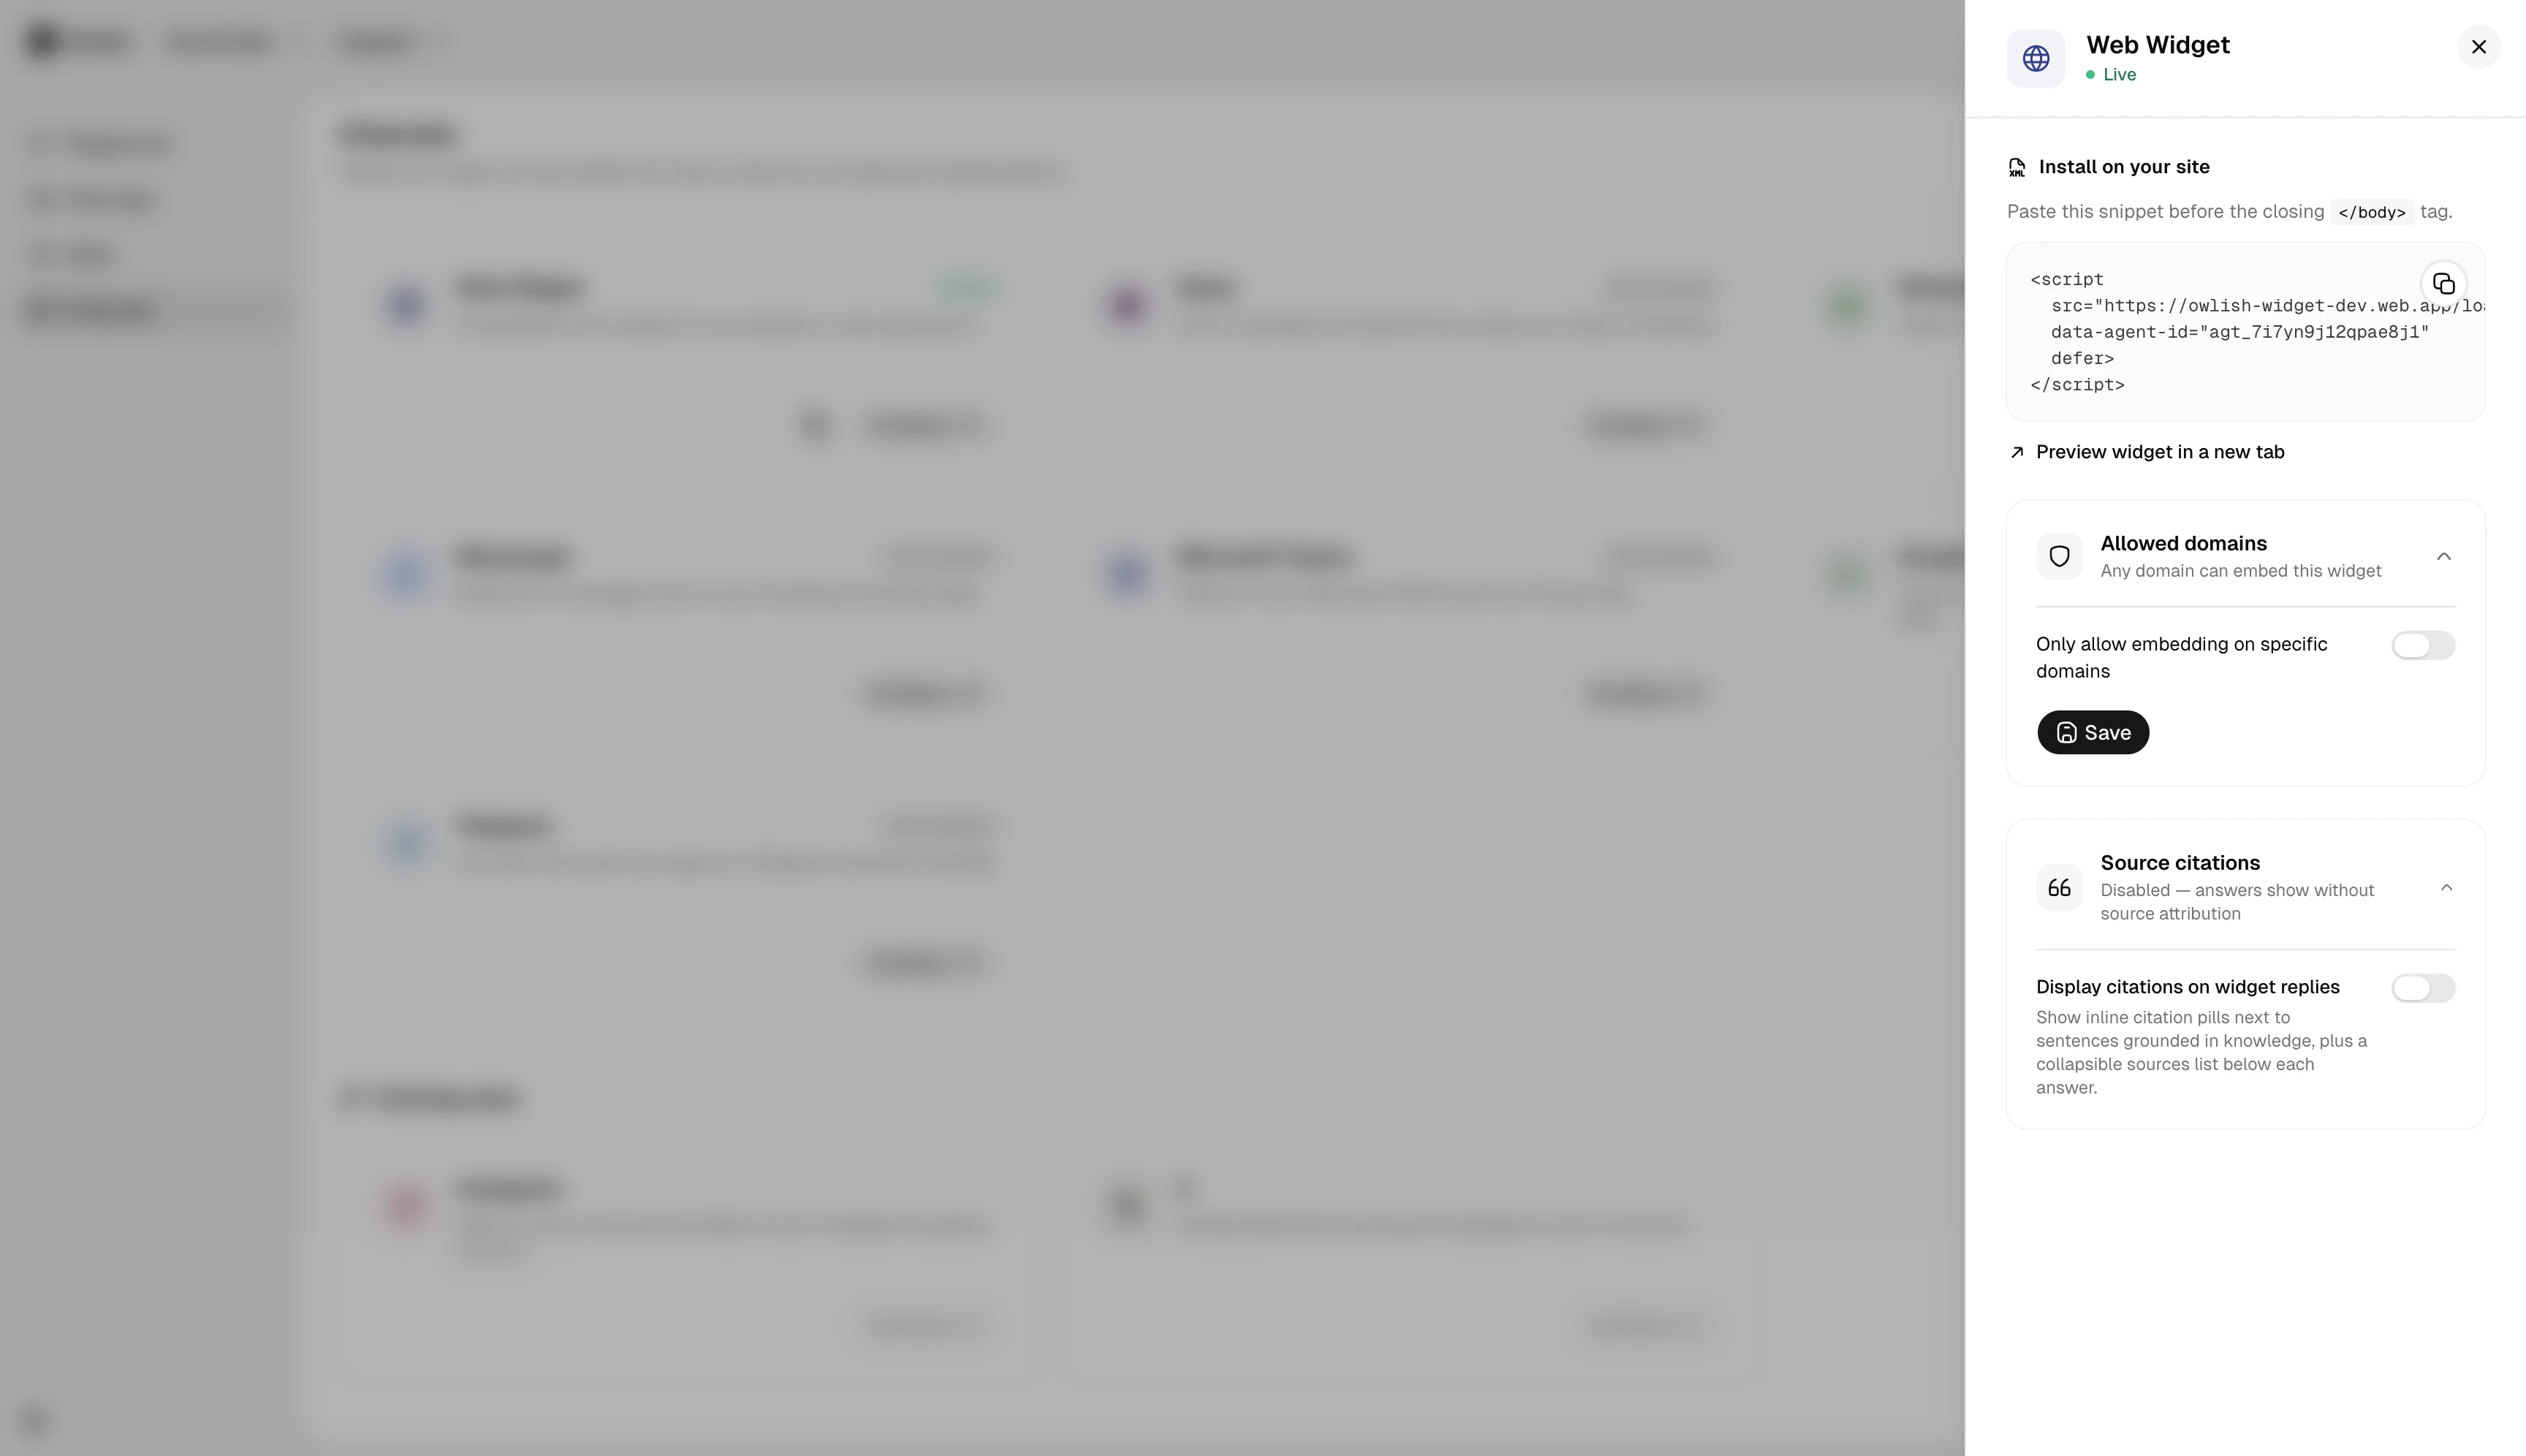
Embed on your site
The embed snippet is generated per agent and is provided in the Channels page. Paste it before </body> on every page where the widget should appear (or via your tag manager).
Common destinations:
- Plain HTML site — paste before
</body>on every page. - WordPress — use a “Header / Footer scripts” plugin or paste in your theme’s footer.
- Shopify — Theme → Customize → “Add custom code” before
</body>. - Tag manager (GTM, Segment, etc.) — wrap in a Custom HTML tag with a page-load trigger.
The widget loads asynchronously and won’t block your page.
Visual customization
For the visual side — colors, logo, welcome message, suggested questions — all of that is on the agent’s Playground page rather than the Channels page. See Customize the widget for which tab each setting lives on.
Next steps
- Customize the widget — tab-by-tab guide to brand, content, and behavior.
- Connect Slack to give the same agent a second channel.