How to Add an AI Chatbot to Your WordPress Site (2026)
A practical 2026 guide to adding an AI support chatbot to a WordPress site: plugin vs. script-embed, the WordPress.com plan limit to watch for, how to ground answers in your real pages and PDFs, where to paste the snippet (classic themes, block themes, page builders), and how to keep answers cited and handed off cleanly.
WordPress runs more than 40% of all websites, which means a huge share of small businesses have the same problem: a site full of answers — shipping pages, FAQs, policy posts, docs — and visitors who would rather ask a question than dig for them (W3Techs, checked June 2026). An AI chatbot can answer those instantly, but only if you install it the right way for WordPress and set it up to answer from your real content instead of guessing.
This guide covers the two ways to add a chatbot to WordPress and why the difference matters, the one WordPress.com plan limit that trips people up, how to ground the agent in your own pages, exactly where to paste the snippet across classic themes, block themes, and page builders, and how to keep answers trustworthy. The first half is tool-agnostic. The “Where Owlish fits” section near the end covers our product, because Owlish is ours.
Two ways to put a chatbot on WordPress
There are really only two install patterns, and most “best WordPress chatbot” roundups blur them:
- A dedicated WordPress plugin. You install a plugin from the WordPress directory, activate it, and configure the bot in the WordPress admin. Convenient, but it’s another plugin to update, it can conflict with caching or security plugins, and a heavy plugin adds PHP and database load to every page.
- A JavaScript embed snippet. The chatbot vendor gives you a small
<script>tag. You drop it into your site’s footer once, and the chat bubble loads on every page. No plugin-specific lock-in, it works with any theme or builder, and it loads asynchronously so it doesn’t block your page.
Most modern AI support tools — including Owlish — use the embed-snippet path, even on WordPress. The script approach is version-safe: it doesn’t care whether you run a classic theme, a block theme, Elementor, or Divi, and it survives theme switches. The trade-off is that you do paste one line of code, which feels scarier than “click install” but is genuinely a one-time, copy-paste job. The rest of this guide assumes the snippet path and shows you exactly where it goes.
First, check whether your WordPress site can even add code
This is the step that wastes the most time, because “WordPress” means two different things and only one of them lets you paste a script freely.
- Self-hosted WordPress (WordPress.org) — the version you install on your own hosting (Bluehost, SiteGround, Kinsta, etc.). You have full control: you can install any plugin and add custom code. The whole rest of this guide applies directly.
- WordPress.com (hosted) — the managed service, where the ability to add plugins or custom scripts depends on your plan. Custom code and plugins have traditionally required the Business plan or higher, and the free WordPress.com tier blocks plugins and custom code entirely. WordPress.com has been loosening this — a 2025 promotion opened plugin access to the Personal and Premium plans (WordPress.com, August 2025) — but the rules shift, so check your specific plan’s plugin and custom-code capability before you commit (WordPress.com plan features).
If you’re on free WordPress.com, you can’t add a script-based chatbot at all — you’d need to upgrade to a plan that allows custom code or move to self-hosted WordPress. Confirm which one you’re on before you pick a tool, so you don’t buy a chatbot you can’t install.
What a WordPress support chatbot actually needs to do
A bot that just “uses AI” is a liability on a content site, because a confident wrong answer about a refund window or a policy costs you trust. A useful WordPress support chatbot needs four things:
- Answers from your real content — your pages, posts, FAQ, and docs — not the open internet or a generic model’s guesses.
- A visible source for answers that touch money or promises, so when it’s wrong you can trace the answer back to a page and fix the page.
- A clean handoff to a human for anything account-specific, disputed, or risky.
- A no-code install that drops into your footer without a developer and stays out of the way of your content.
Notice what’s not on that list: pretending to be a person, handling every edge case on day one, or replacing your contact form entirely. The sites that get value start narrow and honest.
Step 1: Pull your real questions from where customers already ask
Before you train anything, open the channels where people already contact you — your contact form submissions, support inbox, the comments on your posts, even your live-chat history if you have one. Read the last few hundred and group them by intent. On most small-business WordPress sites the high-volume questions are short and repetitive:
- “What’s your return / refund policy?”
- “Do you ship to [place], and how long does it take?”
- “How much does [service] cost?” / “What’s included?”
- “How do I book / cancel / reschedule?”
- “Where can I find [the thing I’m looking for]?”
- “Are you open on [day]?”
Rank them by volume, then by risk. The sweet spot for automation is high volume, low risk, and backed by a page you trust. Push the risky ones — disputes, account changes, anything legal or medical — toward handoff from the start. You’re not trying to automate everything; you’re trying to take the repetitive 60–70% off your plate so a human handles the rest with full attention.
Step 2: Ground the agent in your WordPress content
A WordPress site is unusually good raw material for an AI agent, because the answers are already written down — they’re just spread across pages and posts. Point the agent at the sources that actually answer customer questions:
- Your policy pages (shipping, returns, refunds, privacy, terms).
- Your FAQ page or a help/knowledge section if you have one.
- Service or product pages for what’s included, pricing context, and specs.
- How-to posts and guides you’ve already published.
- Any PDFs you hand out — price lists, spec sheets, manuals, intake forms.
- Short direct answers for things that aren’t written down anywhere yet (hours, booking links, “do you offer X”).
Two rules keep this clean. First, one clear answer per topic — if your return window is stated three different ways across the site, the agent will pick one at random, so reconcile them. Second, date anything time-sensitive (holiday hours, sale terms, seasonal availability) so the agent doesn’t quote an expired promise.
This is the part the whole category agrees on: source quality and clear automation boundaries are the actual work, not an afterthought. SiteGPT’s customer-support guide and Chatbase’s customer-service guide both treat grounding in good content as the foundation of a support bot that doesn’t embarrass you (SiteGPT) (Chatbase).
Step 3: Add the widget to WordPress (the reliable path)
You have your snippet. Here’s where it goes, depending on how your site is built. The goal is the same in every case: the script ends up loading on every page, ideally near the footer so it doesn’t block rendering.
Option A — a header/footer code plugin (recommended for most people)
The simplest, most theme-proof method is a dedicated “insert headers and footers” plugin. The most widely used is WPCode (formerly “Insert Headers and Footers”), running on more than 2 million sites (WPCode on WordPress.org). The reason it’s worth one extra plugin: your snippet lives independently of your theme, so it survives theme updates and theme switches.
- In your WordPress admin, go to Plugins → Add New, search for a headers-and-footers / code-snippets plugin, install and activate it.
- Open its settings (often under Code Snippets or Settings → Insert Headers and Footers).
- Paste your chatbot snippet into the Footer (body) box, not the header, so it loads after your content.
- Save. Open your site in a private window and confirm the chat bubble appears and answers.
Option B — your theme’s built-in footer scripts
Many themes (and most modern block/Full Site Editing themes) expose a footer-scripts field or a custom-code area in the Customizer or theme options. If yours does, paste the snippet there. This avoids an extra plugin but ties the snippet to that theme — if you switch themes, you’ll need to re-add it.
Option C — a page builder (Elementor, Divi, Bricks)
Page builders usually have their own custom-code panel (for Elementor: Elementor → Custom Code; Divi and Bricks have equivalents). Adding the snippet there applies it site-wide through the builder. This is fine, but if you ever move off the builder, the snippet goes with it — so the header/footer plugin in Option A is still the most portable choice.
Don’t edit footer.php directly
You can paste the snippet into your theme’s footer.php, but don’t. A theme update will overwrite it, and a typo can take down your whole site. If you must edit theme files, use a child theme — but for a single script tag, a header/footer plugin is faster, safer, and survives updates.
Step 4: Restrict the widget to your domain, then test
If your chatbot supports a domain allowlist, add your real domain (and any staging or www/non-www variants) so the widget only loads where you intend and can’t be embedded on someone else’s site. Then test like a customer:
- Open the site in a private/incognito window so caching and login state don’t mask problems.
- Paste in the exact wording of real past questions, including the messy ones.
- Check three things on each answer: Is it correct? Is it grounded in the right page? Does it stop and hand off when it should?
If you run a caching plugin (WP Rocket, W3 Total Cache, LiteSpeed) or a CDN, clear the cache after adding the snippet — otherwise you may be testing an old cached page and think the install failed when it didn’t.
Step 5: Set handoff rules before launch, not after
Every site chatbot needs explicit stop conditions. Write them down before you go live. The agent should hand off to a human when:
- it can’t find a relevant source for the question;
- the question involves a specific order, booking, payment, or account change it can’t verify;
- it’s a complaint, dispute, or anything with legal, financial, or safety weight;
- the customer asks for a person;
- it has already tried and failed to clarify once or twice.
Then make the handoff useful. The person who picks up should see the customer’s question, the source the agent used (or that it had none), and what the agent already said — without scrolling the entire transcript. A fast, well-summarized handoff is the difference between “the bot wasted my time” and “that was actually smooth.”
This bot-then-human pattern is where customer-experience research keeps landing: industry trend roundups for 2026 describe the winning model as automation handling the routine and routing complex issues to a human with full context, not replacing the human entirely (CX Dive: 2026 CX trends).
Step 6: Watch the first two weeks, then let it run
After you launch, read conversations by hand for the first two weeks. You’re looking for patterns, and each one is a small content fix:
- the agent citing the wrong page for a topic (split or clarify the page);
- visitors asking the same thing in different words that the agent misses (add a direct answer);
- the agent being too confident about an exception (tighten the page, put the caveat next to the rule);
- late handoffs where it should have stopped sooner (tighten the handoff rule).
A WordPress chatbot isn’t “set and forget” — it’s “set, read, and tune for two weeks,” after which it largely runs itself. The content you fix to help the bot usually helps your human readers and your SEO too.
WordPress-specific gotchas to plan around
A few things bite WordPress users specifically:
- Caching and “it’s not showing up.” WordPress caching is aggressive. If the widget doesn’t appear, clear your page cache and CDN cache before assuming the snippet is wrong.
- Cookie consent and privacy. If you run a consent banner (common under GDPR), decide whether the chat widget should load before or after consent, and disclose it in your privacy policy. A chatbot that sets cookies before consent can create a compliance gap.
- Security/firewall plugins (Wordfence and similar) occasionally block third-party scripts. If the widget fails only on the live site, check whether a security plugin is stripping it.
- Multilingual sites (WPML, Polylang). If your content is translated, make sure you ground the agent in the languages you actually support, and that it answers in the visitor’s language rather than guessing.
- AMP pages. If you serve AMP, custom JavaScript is restricted, so a standard chat widget typically won’t load on AMP versions of your pages — plan for that or skip AMP on pages where chat matters.
What to measure (and what to ignore)
Message counts are easy to see and almost useless — a chattier bot is not a better bot. Track outcomes instead:
- Resolved conversations the agent handled fully without a human.
- Repeat questions that disappeared after you fixed a page.
- Handoffs caused by genuinely missing knowledge (a content gap to fill) versus handoffs that are working as designed (risky topics).
- Real deflection, not a visitor giving up — a closed chat is not the same as a solved problem.
If you want the deeper version of this, our guide to ticket deflection rate explains why deflection and resolution aren’t the same number, and how to avoid faking the metric.
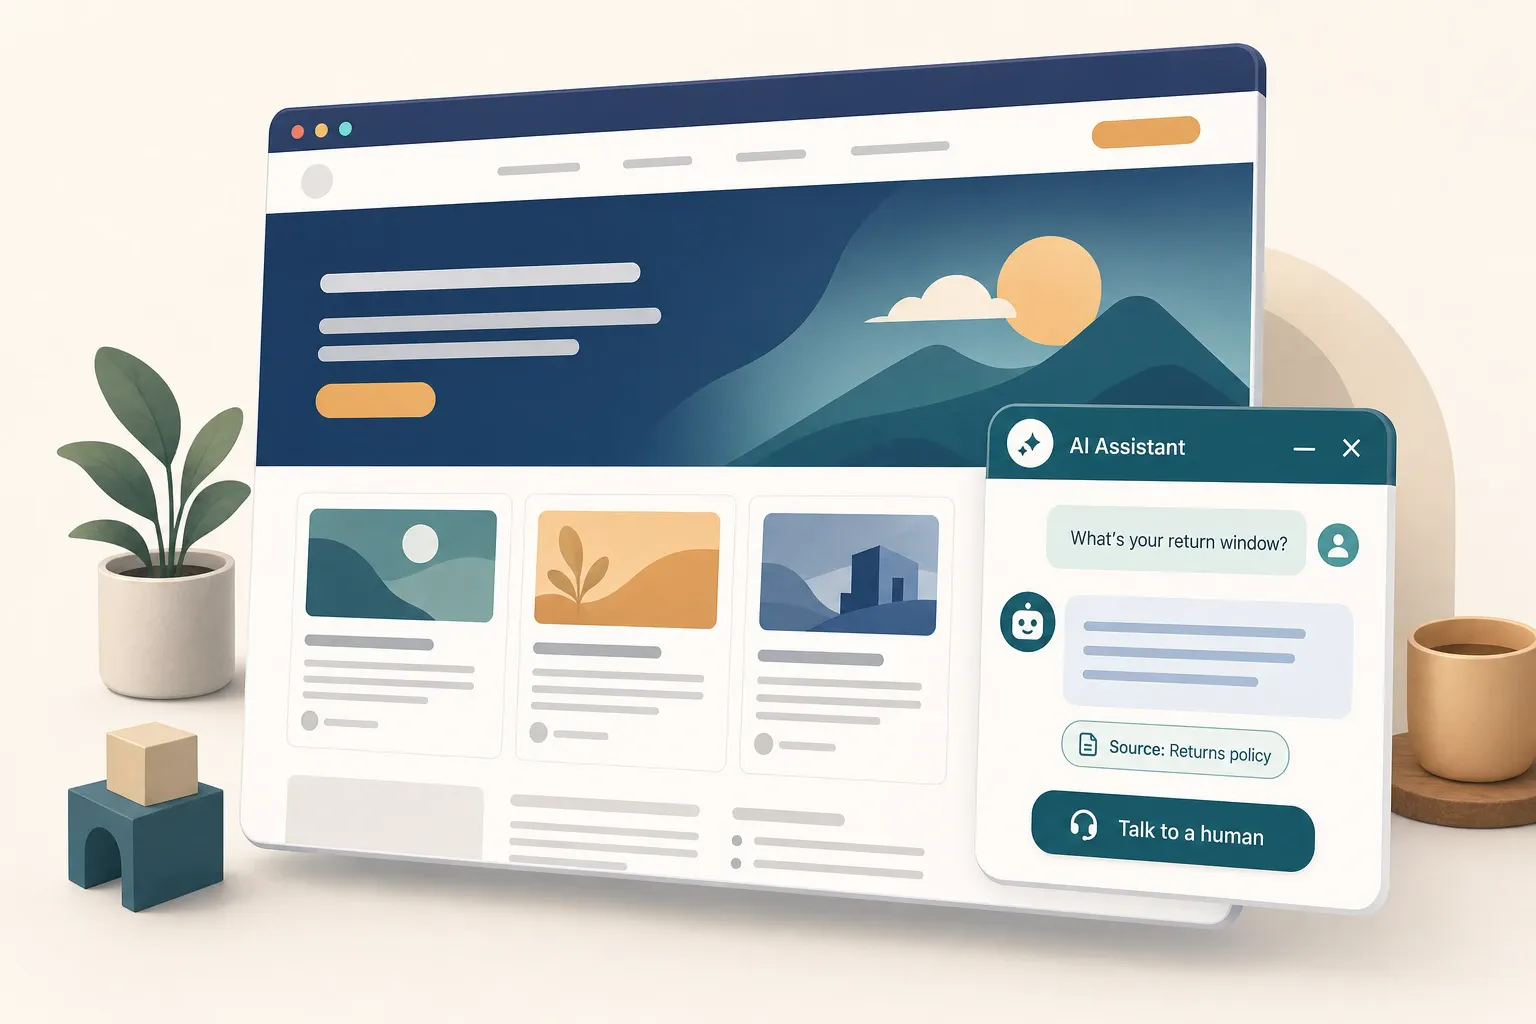
Where Owlish fits
Owlish is a no-code AI support agent that answers from your own content, shows where each answer came from, and hands off to a human when a question shouldn’t stay with AI. For a WordPress site, that maps to the workflow above:
- Embeds on WordPress via the web widget. Owlish gives you a per-agent embed snippet. Drop it into your footer with a headers-and-footers plugin, your theme’s footer-scripts field, or your page builder’s custom-code panel — the snippet path from Step 3. There’s no separate Owlish WordPress plugin today, and that’s deliberate: one script tag works with any theme or builder and survives theme switches. The web widget is included on every plan, including the Free plan, so you can start at no cost (Web widget docs) (Customize the widget).
- Trains on your WordPress content. Point it at your site to ingest your pages and posts, and add files — PDF, DOCX, CSV, TXT, Markdown — plus short direct responses, so answers come from sources you control (Website sources) (File sources).
- Grounded answers with citations. Answers can show the source they came from, and you can inspect which source grounded an answer to debug and improve it (Citations docs).
- A domain allowlist for the widget. Restrict where the widget can load so it only runs on your site. The domain allowlist is available from the Starter plan ($39/mo billed annually, or $49/mo monthly) (Web widget docs) (Plans).
- Human handoff and a shared inbox. A visitor can ask for a person, the agent can escalate on its own, or an operator can take over from the helpdesk inbox. Human handoff to operators and the shared helpdesk inbox are available from the Growth plan ($119/mo billed annually, or $149/mo monthly) (Human handoff docs) (Conversations docs) (Plans).
Be honest about the limit: Owlish grounds answers on the content you ingest — it doesn’t connect to your WooCommerce orders, bookings, or member accounts. So it answers the general “what’s your return policy” from your policy page and hands off for “where is my specific order.” If your top priority is automated, account-specific lookups wired into WooCommerce or a membership plugin, you’ll want a tool built around that integration. If your priority is grounded answers to the repetitive policy, service, and FAQ questions — with citations and clean handoff — that’s exactly what Owlish is for.
WordPress AI chatbot launch checklist
- Confirm whether you’re on self-hosted WordPress.org or WordPress.com, and that your plan allows custom code.
- Read the last few hundred contact-form, inbox, and comment questions; group them by intent.
- Rank intents by volume and risk; pick a few high-volume, low-risk ones to start.
- Reconcile your pages so each topic has one clear, dated answer.
- Add your policy, FAQ, service pages, and PDFs as sources.
- Install a headers-and-footers plugin (or use your theme/builder’s custom-code field).
- Paste the embed snippet into the footer, not the header.
- Restrict the widget to your domain; clear your cache and CDN.
- Write handoff rules for orders, bookings, complaints, and “ask for a person.”
- Test real customer questions in a private window before announcing it.
- Read conversations by hand for two weeks and fix weak pages.
- Track resolved conversations and real deflection, not message counts.
FAQ
How do I add an AI chatbot to WordPress without a plugin?
Use your theme or page builder’s custom-code field. Most modern themes expose a footer-scripts box in the Customizer, and builders like Elementor, Divi, and Bricks have a custom-code panel. Paste the chatbot’s embed snippet into the footer there. The trade-off is that the snippet is tied to that theme or builder — if you switch, you re-add it. For a snippet that survives theme changes, a small headers-and-footers plugin is the more portable option.
Do I need the WordPress Business plan to add a chatbot?
Only on hosted WordPress.com, and the rules have been changing. The free WordPress.com tier blocks plugins and custom code, so a script-based chatbot won’t install there. Plugins and custom code have traditionally required the Business plan, though WordPress.com has been extending plugin access to lower paid tiers like Personal and Premium — so check your current plan’s capabilities rather than assuming. Self-hosted WordPress.org sites can add a chatbot on any plan, because you control the code.
Where exactly do I paste the chatbot code in WordPress?
In the footer, so it loads after your content and doesn’t block rendering. The cleanest place is a headers-and-footers plugin’s “Footer” box; alternatively, your theme’s footer-scripts field or your page builder’s custom-code panel. Avoid editing footer.php directly — a theme update will erase it. After pasting, clear any caching plugin or CDN cache and confirm the bubble appears in a private window.
Will an AI chatbot slow down my WordPress site?
A well-built widget loads asynchronously and shouldn’t block your page, especially when the snippet is in the footer rather than the header. The bigger speed risk is stacking multiple chat, popup, and tracking scripts that each load their own code. Embed-snippet chatbots are usually lighter than heavy all-in-one plugins because they don’t add PHP or database load to every request.
Can the chatbot answer questions about a specific customer’s order or account?
Only if it integrates with your store or membership system. A content-trained chatbot like Owlish answers the general question from your pages (“orders ship in 1–2 business days”) and hands off the specific one (“where is my order #1234”). If you need automated WooCommerce order lookups or account-specific answers, confirm the tool connects to those systems before you promise it to customers.
WordPress is a trademark of the WordPress Foundation. WooCommerce, Elementor, Divi, Bricks, WPCode, and other product names mentioned are trademarks of their respective owners. Owlish is not affiliated with or endorsed by any of them. Platform details and plan availability described here were checked against public documentation in June 2026; verify current behavior in your own setup, since platforms change over time.
An AI chatbot earns its place on a WordPress site when it has a narrow job, grounded answers, and a fast stop point — not when it tries to do everything. Start with your highest-volume policy and FAQ questions, ground it in the pages you already wrote, and expand once visitors and your team trust it.
If you want to try that in Owlish, build your first agent, point it at your WordPress site and PDFs, test the questions your visitors already ask, and paste the widget snippet into your footer before you announce it.